Get your business open for business
From an empty account to a live, bookable business: pick your trade, walk the eight-step setup, go live, and connect payments — following the checklist the dashboard already gives you.
7 steps · about 15 minutes
- 1
Follow the checklist on your dashboard
Dashboard
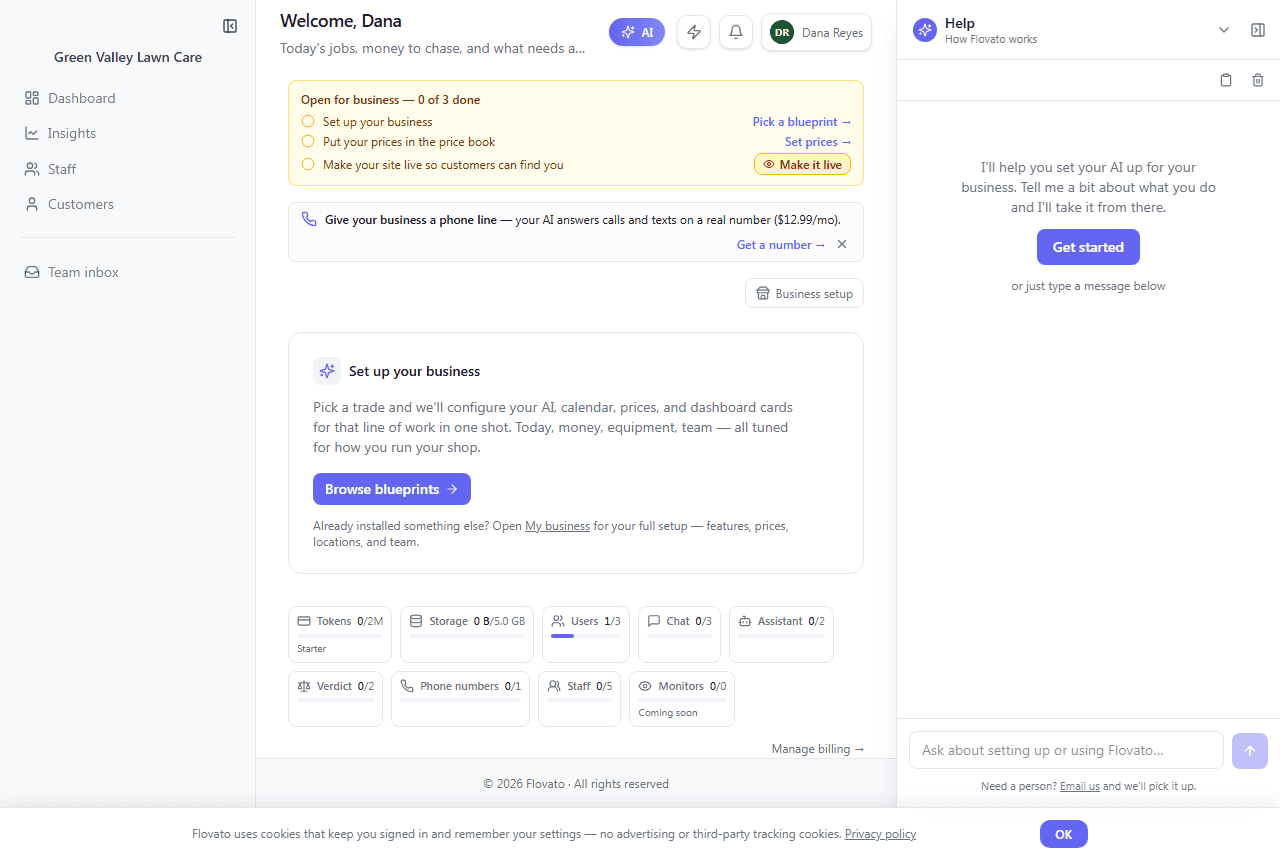
The first thing you see after signing in is the "Open for business" checklist at the top of the dashboard. It counts what's left ("0 of 3 done") and every line is a link to the screen that finishes it: "Set up your business — Pick a blueprint →", "Put your prices in the price book — Set prices →", and "Make your site live so customers can find you — Make it live".
You don't need to hunt through menus for any of this. Work down the list; lines cross themselves off as you finish them.
Setting up your trade adds a line to the checklist — "Let customers pay your invoices online" — so the count goes from 3 to 4. That's expected, not a step going backwards.
- 2
Pick your trade
Dashboard → Pick a blueprint
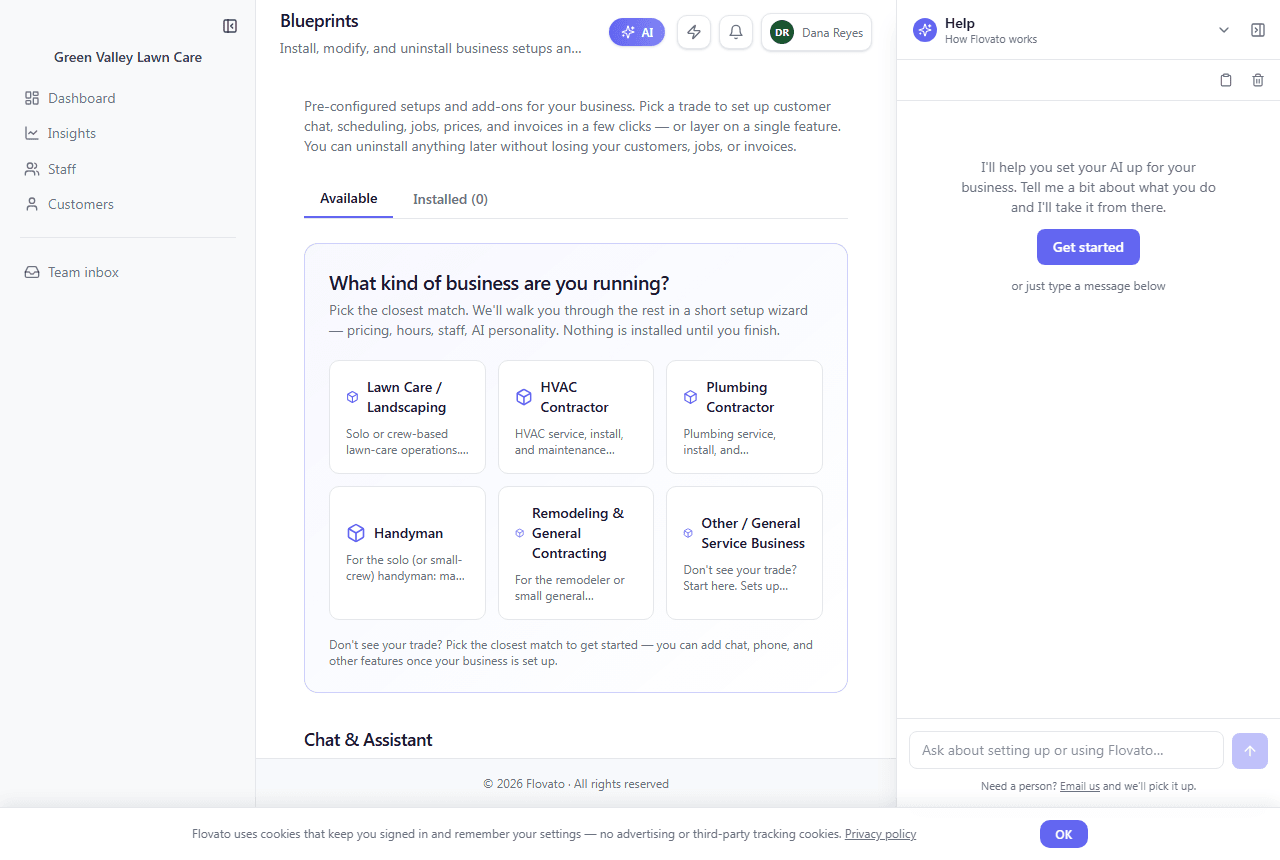
A blueprint is a ready-made setup for your line of work. It installs your customer chat, booking, jobs, a price book already stocked for your trade, and invoicing in one go.
Six trades are listed: Lawn Care / Landscaping, HVAC Contractor, Plumbing Contractor, Handyman, Remodeling & General Contracting, and Other / General Service Business for anything else. Click the closest match. Nothing is installed until you finish the short setup wizard, so it's safe to look around.
Only one trade can be installed at a time. If you switch later, your business info, locations, and hours carry over, and uninstalling never deletes your customers, jobs, or invoices.
- 3
Wizard steps 1–3: who you are, when you're open, where you work
Setup wizard → Steps 1 to 3
Step 1, Business identity: your business name (shown in chat, on invoices, and on your booking page), an optional tagline, a one- or two-sentence description, and where new bookings and leads get sent: a notification email and an optional phone for text alerts.
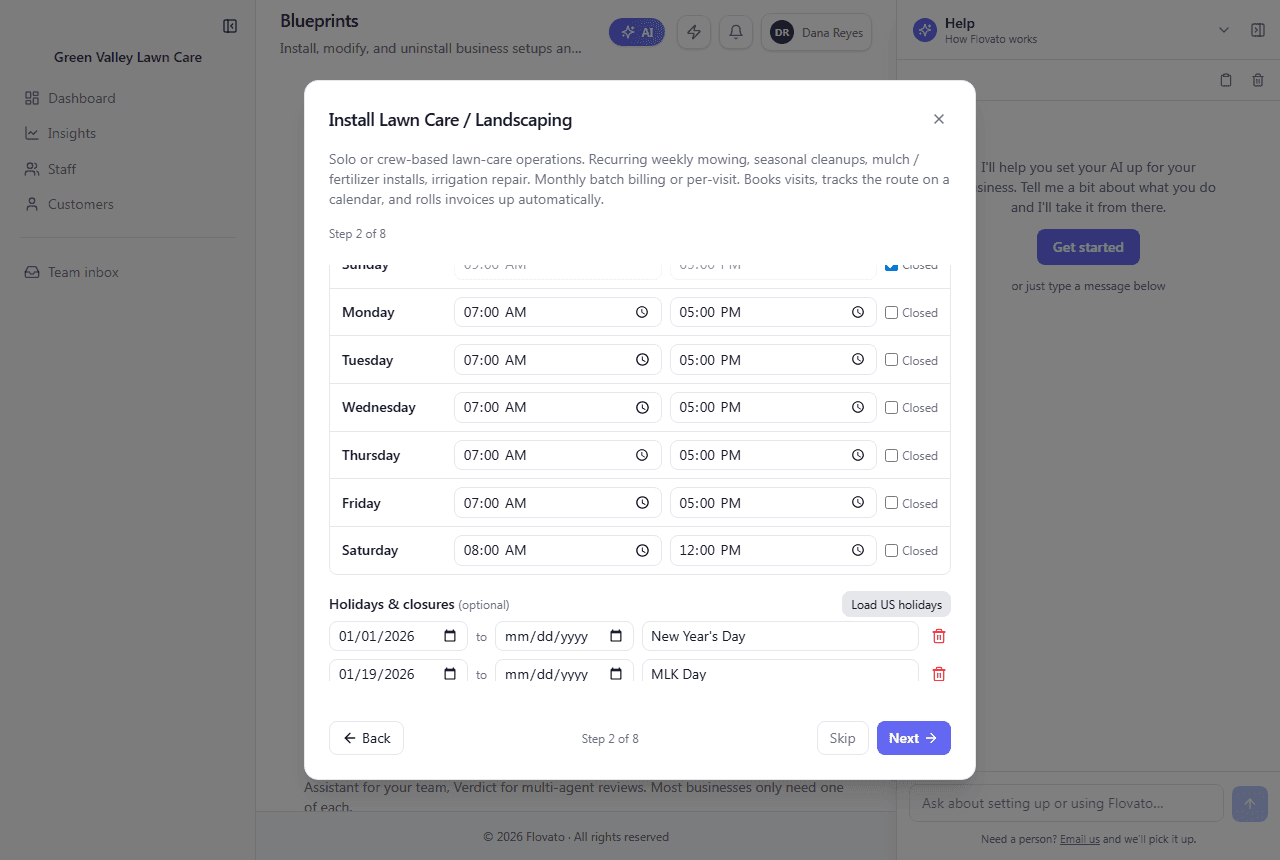
Step 2, Your business hours: pick your timezone and set each day's hours. Each day starts with 9:00 AM to 5:00 PM filled in and has a Closed box. Tick it for days you don't work. "Load US holidays" adds the federal holidays as closed days in one click, and you can remove any you stay open for. Customers are only ever offered times inside these hours.
Step 3, Where you operate: your main location's address, plus an optional service area. You can set a radius in miles, a drive time in minutes, or a list of ZIP codes. Leave all three blank to serve anywhere.
Green Valley set Monday–Friday 7 AM to 5 PM, opened Saturday 8 to noon, loaded the US holidays, and gave its Greensburg, PA shop a 20-mile service area. The review page summed it up as "Greensburg, PA · within 20 mi".
- 4
Wizard steps 4–7: your AI's voice, your crew, invoice numbers, prices
Setup wizard → Steps 4 to 7
Step 4, How your AI sounds: pick Professional, Friendly, Concise, or Helpful, or choose Custom and describe the voice in your own words. Every robot (your public chat, your Staff Assistant, and your phone line) uses it.
Step 5 asks whether you work with a crew. Step 6 sets the prefix for your invoice numbers (INV by default, so your first invoice is INV-0001).
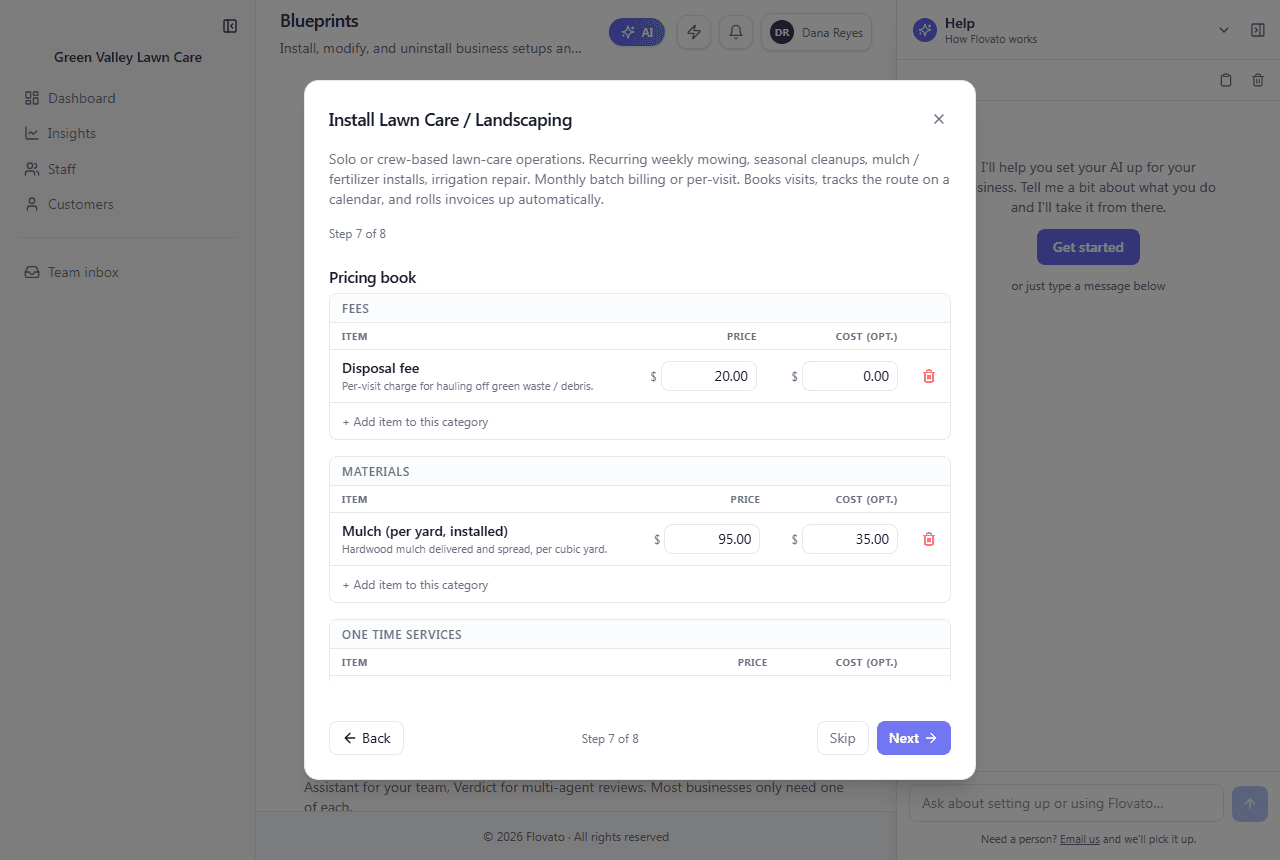
Step 7 is your price book, already stocked for your trade. Every line has a price and an optional cost, and "+ Add item to this category" adds your own. Change any number that doesn't match what you charge. These are the prices your chat quotes and your invoices pull from.
Don't agonize over prices here. The same price book is on My business → Prices & content, and changes there take effect right away.
The lawn-care price book arrives with weekly mowing at $45 per visit plus $35 per acre, edging only at $25, spring and fall cleanup labor at $75 an hour, mulch at $95 a yard installed, fertilizer at $7 per 1,000 sq ft, and a $20 disposal fee.
- 5
Review and install
Setup wizard → Step 8
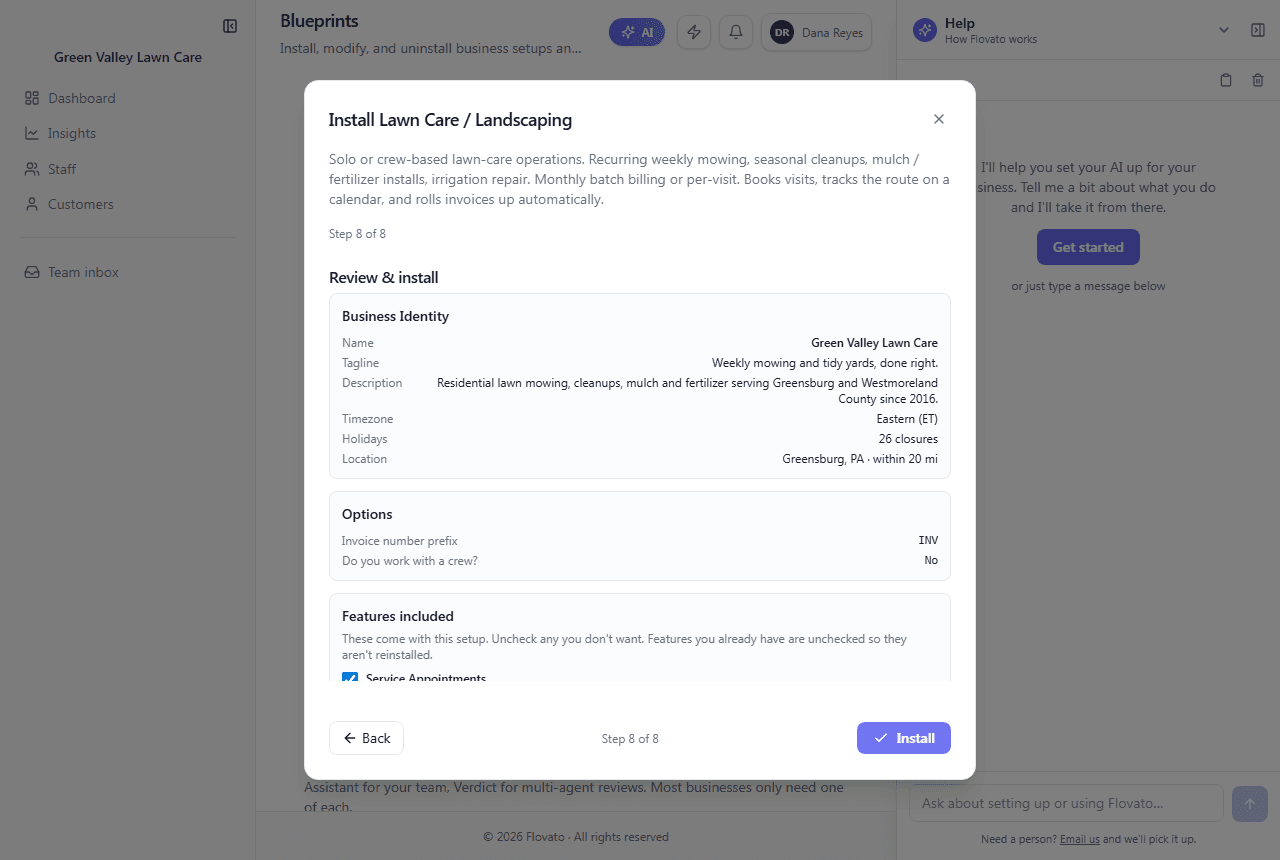
The last step shows everything you entered — name, tagline, timezone, holidays, location, and options — with Back to fix anything.
Under "Features included" are the pieces this trade installs, each with a checkbox. For lawn care: Service Appointments (customers book online), Mobile Service Dispatch (route-aware scheduling), and Small-Business Invoicing. Your customer chat and Staff Assistant are installed alongside them. Click Install.
When it's done you get a short "Good next steps" list: add your first customer, create a weekly mowing job, open your route board, review your prices, and add a crew member. "I'll decide later" closes it.
- 6
Go live
Dashboard → Make it live
Until you go live, your site is hidden. Everything you've set up stays out of sight so you can finish at your own pace.
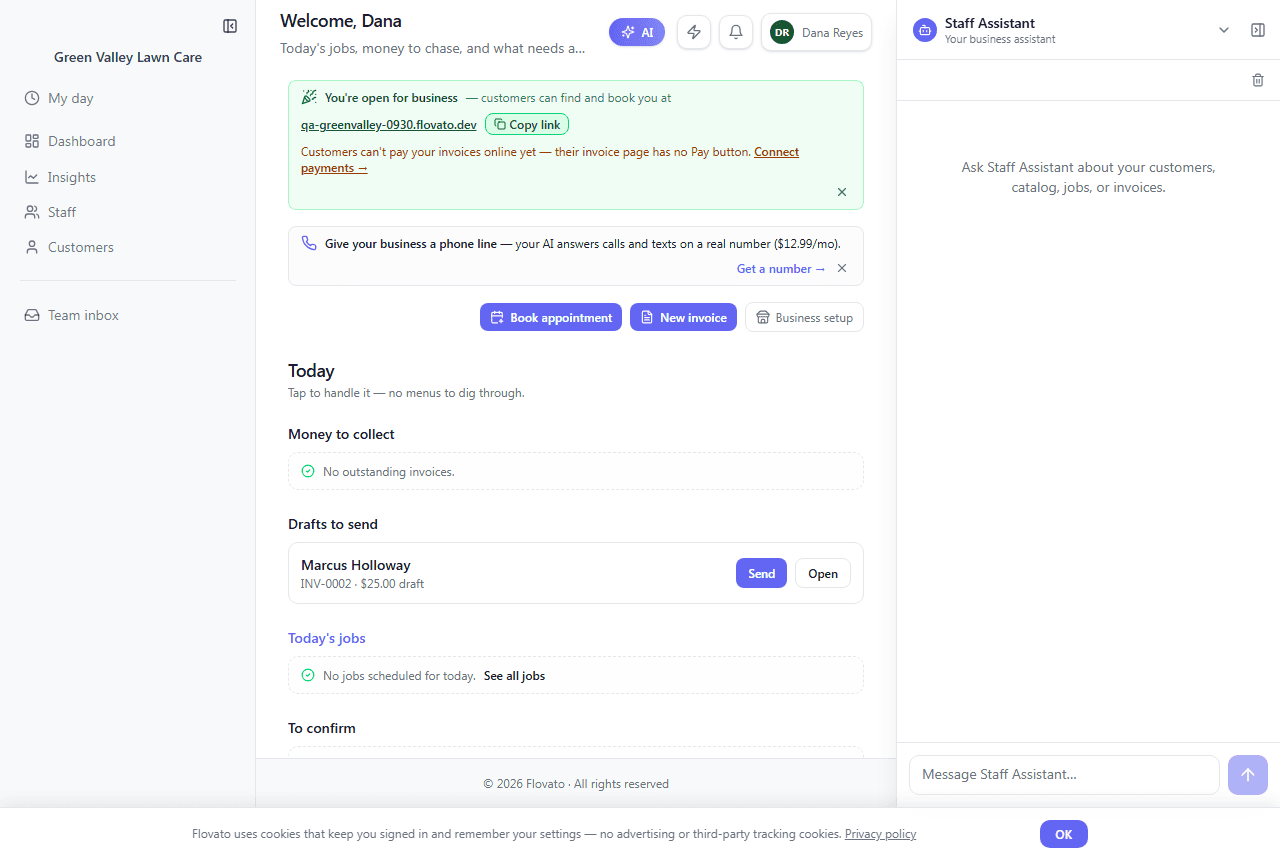
When you're ready, click "Make it live" on the dashboard checklist. It asks once, "Customers will find and book you — Yes, go live", and waits for you to confirm. After that, the top of the dashboard reads "You're open for business — customers can find and book you at" your web address, with a Copy link button next to it.
Changed your mind? "Take offline" on My business → General tab closes the site again.
Paste that link anywhere a customer might look: your Google Business Profile, your Facebook page, the truck magnet. It's the front door to your chat and your booking.
Green Valley's address is qa-greenvalley-0930.flovato.dev. Opened in a fresh browser, it goes straight to the Green Valley chat: "How can we help you today?" with buttons for Schedule an appointment, What times are available?, What do you offer?, and How much does it cost?
- 7
Connect payments so customers can pay online
Dashboard → Connect payments →
The last checklist line is "Let customers pay your invoices online". Until you connect a payment provider, your invoices still work (customers can open and download them), but the page they see has no Pay button.
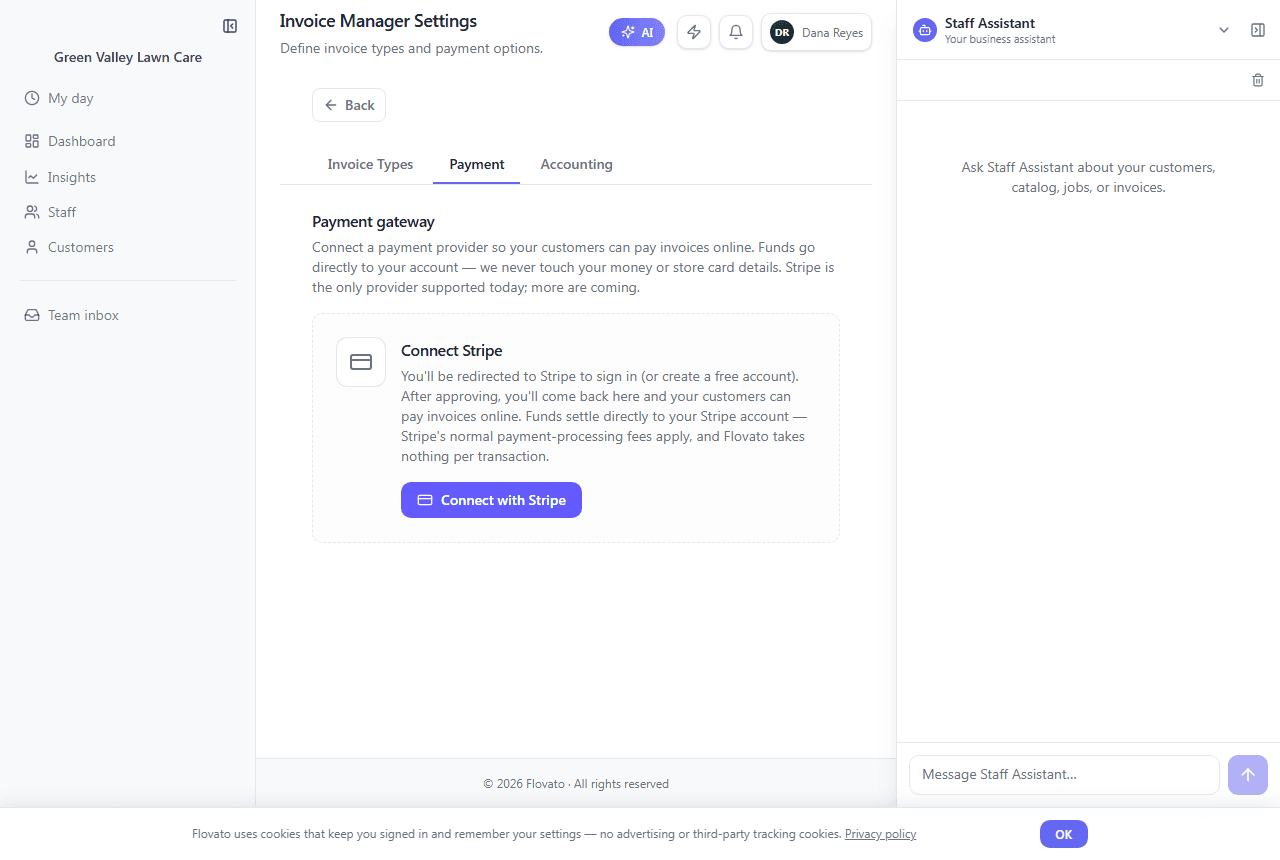
"Connect payments →" opens the Payment settings. Stripe is the provider supported today. "Connect with Stripe" sends you to Stripe to sign in or create a free account, then brings you back. Money goes straight to your own Stripe account. Stripe's normal processing fees apply, and Flovato takes nothing per transaction.
Ready to try it?
Setting up takes about ten minutes, and the built-in Help assistant is there whenever you get stuck.
Get started