Send your first invoice and get paid
Draft it, pull lines from your price book, lock it, send it, record the payment — then hand your Assistant the invoice keys and just ask "who owes me money?". The whole money loop on a real invoice.
8 steps · about 9 minutes
- 1
Meet the Invoices screen
Invoices (left menu)
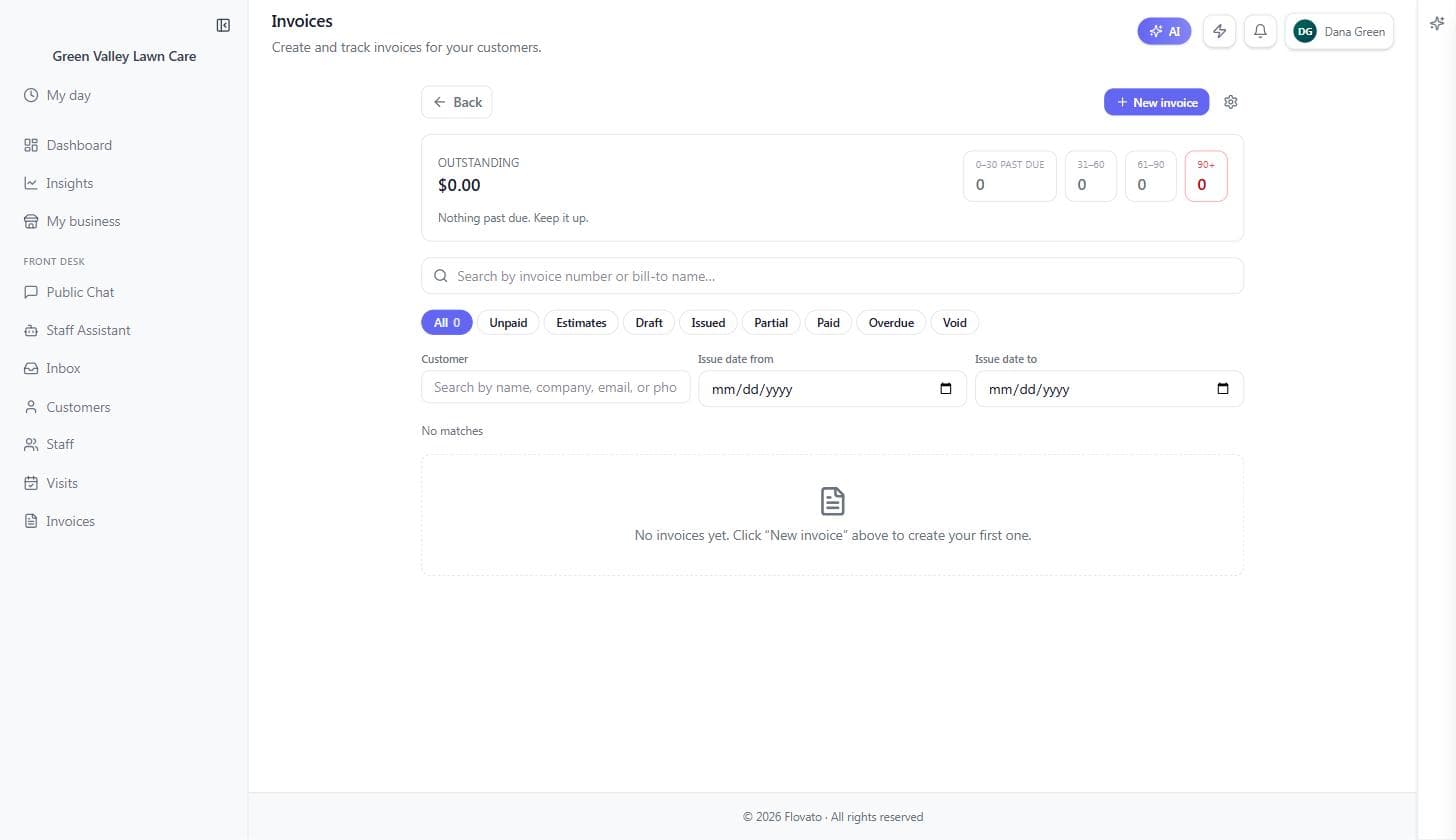
One screen owns the money you're owed. The big number is what's outstanding, and the aging boxes next to it (0–30, 31–60, 61–90, 90+ days past due) show how long it's been sitting — the 90+ box turns red because that money is on fire.
Below that: search, and one-click filters for every state an invoice can be in — Unpaid, Estimates, Draft, Issued, Partial, Paid, Overdue, Void. Yes, Estimates live here too: an estimate is just an invoice that hasn't committed yet, so quotes and bills share one home instead of two screens. Empty right now is a good thing; "New invoice" up top is where the first one starts.
Or just ask your Assistant: With the Staff Assistant connected you don't even need this screen to check — ask it "Who owes me money?" and it totals your unpaid invoices and names names. The last step of this guide shows it live.
- 2
Start a draft
Invoices → New invoice
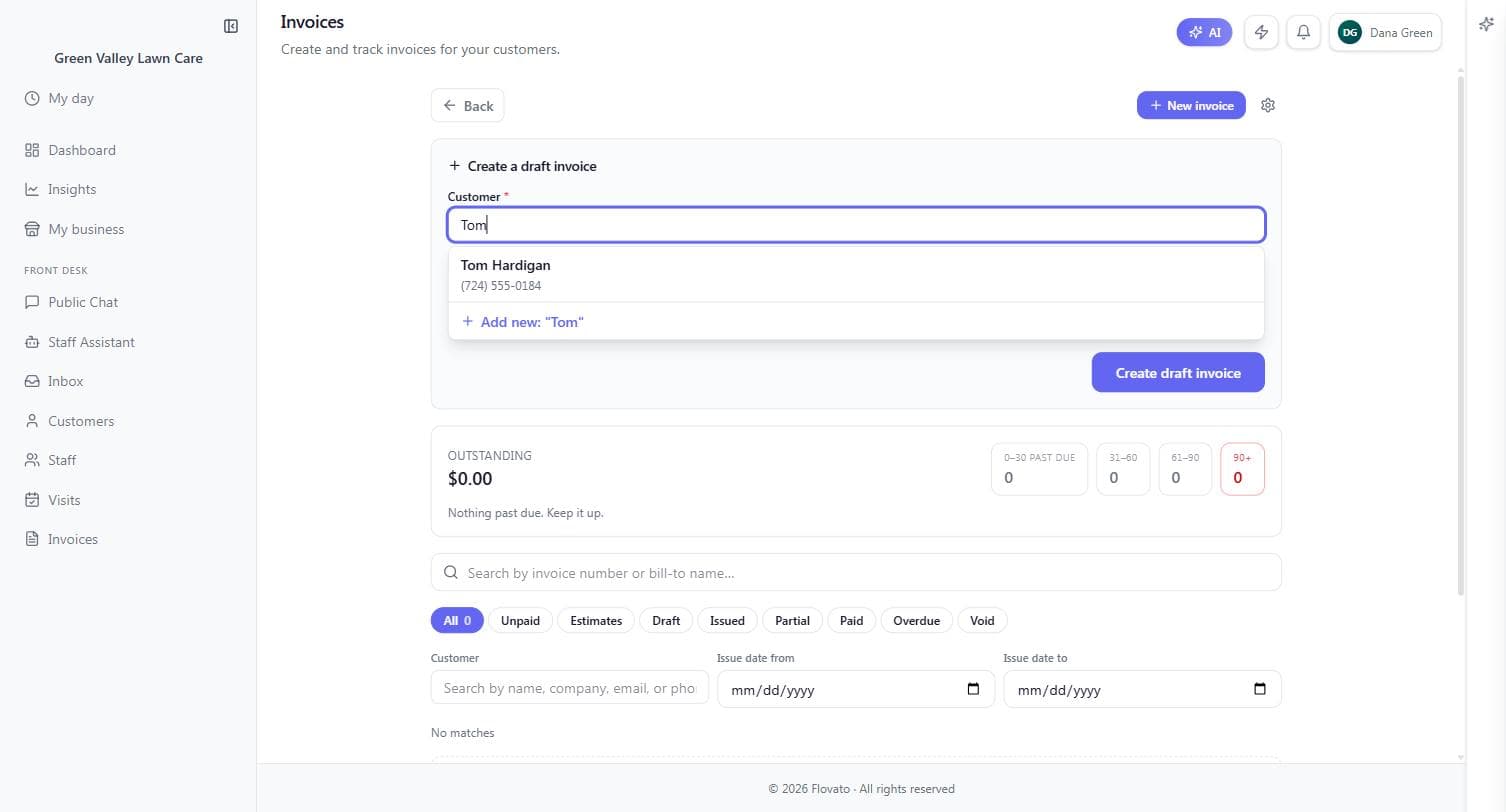
Pick the customer — search by name, company, email, or phone. If they're not in your list yet, the same box offers "Add new" and creates them on the spot; no detour through another screen.
Dates are optional at this stage. Hit "Create draft invoice" and you get a numbered draft (Green Valley's first was INV-0001) that's a private scratchpad: nothing is sent, nothing is final, edit freely.
The invoice page itself carries the bookkeeping fields when you want them — Invoice settings holds the due date, a service date ("when work was performed"), a PO number for customers who need their own reference, and an Assigned picker to put a teammate's name on it. All optional; a solo operation can ignore every one of them.
Typing "Tom" matched Tom Hardigan from the customer list — one click on his name, one on Create, and the draft existed.
- 3
Add lines from your price book
The invoice → Line items → From catalog
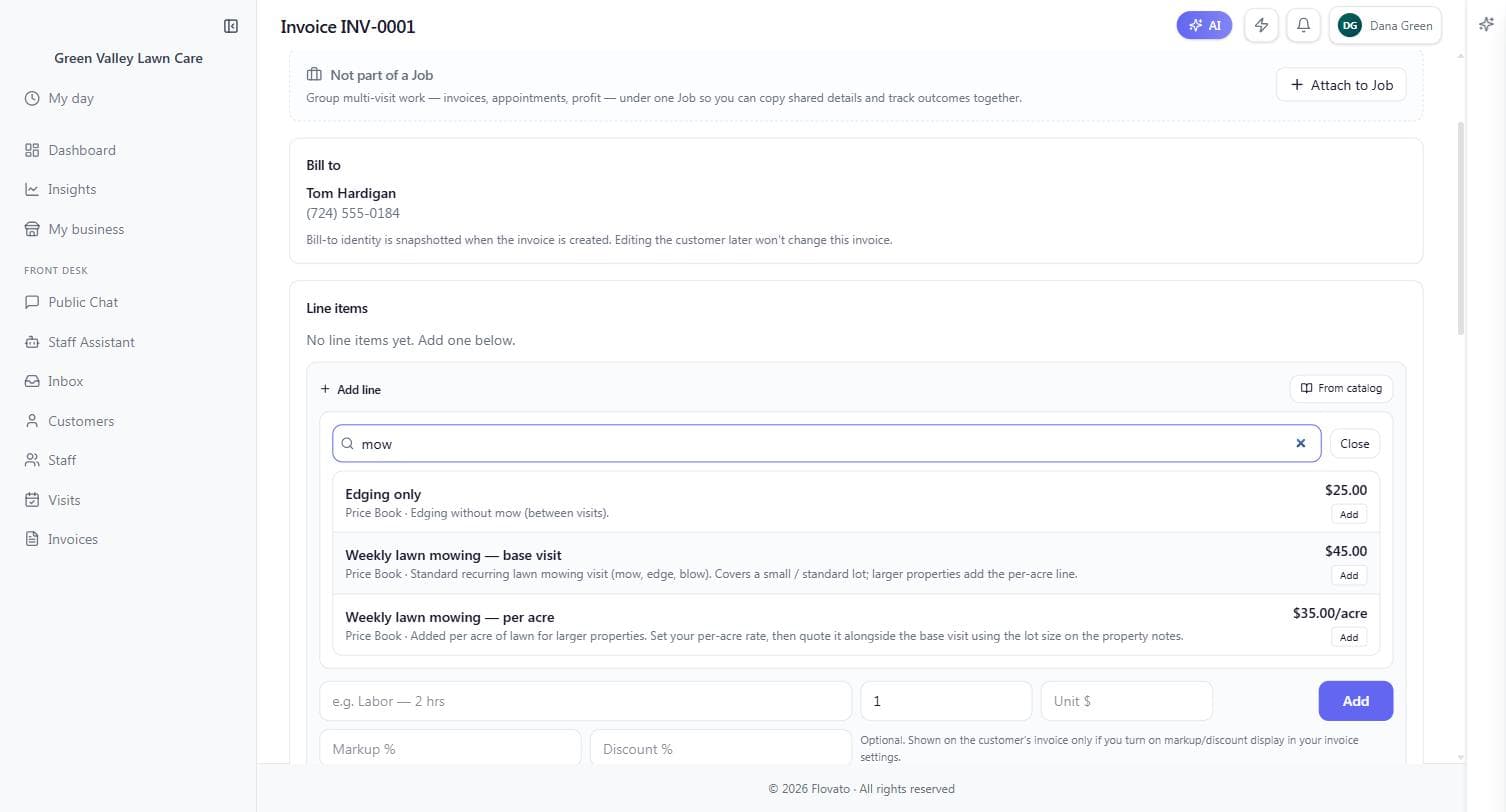
"From catalog" searches the same price book your robot quotes from (chapter 6 of Getting Started) — so the number on the invoice is the number the chat promised. Each hit comes with its price and description; Add drops it in as a finished line, description and all.
One-offs are just as easy: the free-type row takes a description, quantity, and unit price for anything that isn't in the book. The subtotal and total recalculate as you go.
Searching "mow" surfaced Weekly lawn mowing — base visit ($45) with its full description; "disposal" added the $20 haul-off fee. Two clicks, $65 total, descriptions included.
- 4
Finalize — the lock is the point
The invoice → Finalize invoice
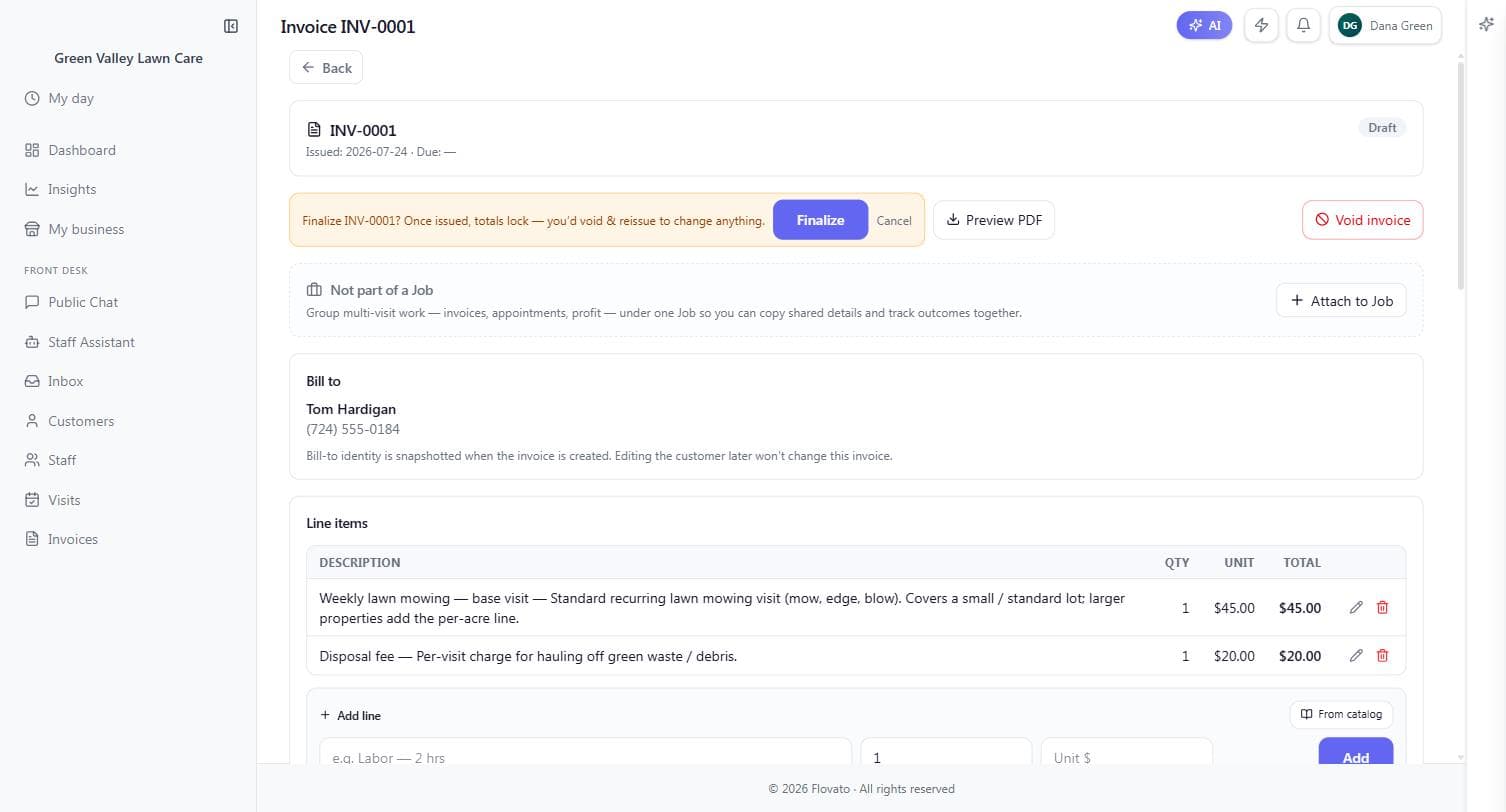
A draft becomes a real invoice when you finalize it, and the button levels with you first: "Finalize INV-0001? Once issued, totals lock — you'd void & reissue to change anything."
That lock isn't red tape — it's what makes the document trustworthy. Once a customer has seen a number, that number can't quietly drift. Genuinely wrong? Void the invoice and issue a fresh one; the paper trail stays honest.
One more thing on this page worth knowing: the "Attach to Job" box. When an invoice belongs to bigger, multi-visit work, attaching it to a Job groups the invoices, appointments, and profit for that work in one place — skip it for one-off visits, reach for it when a project spans weeks.
- 5
Send it — three ways
The invoice, once issued
An issued invoice grows three delivery buttons: "Send by email," "Download PDF" for printing or attaching yourself, and "Open public view" — a secure private link you can text straight to the customer.
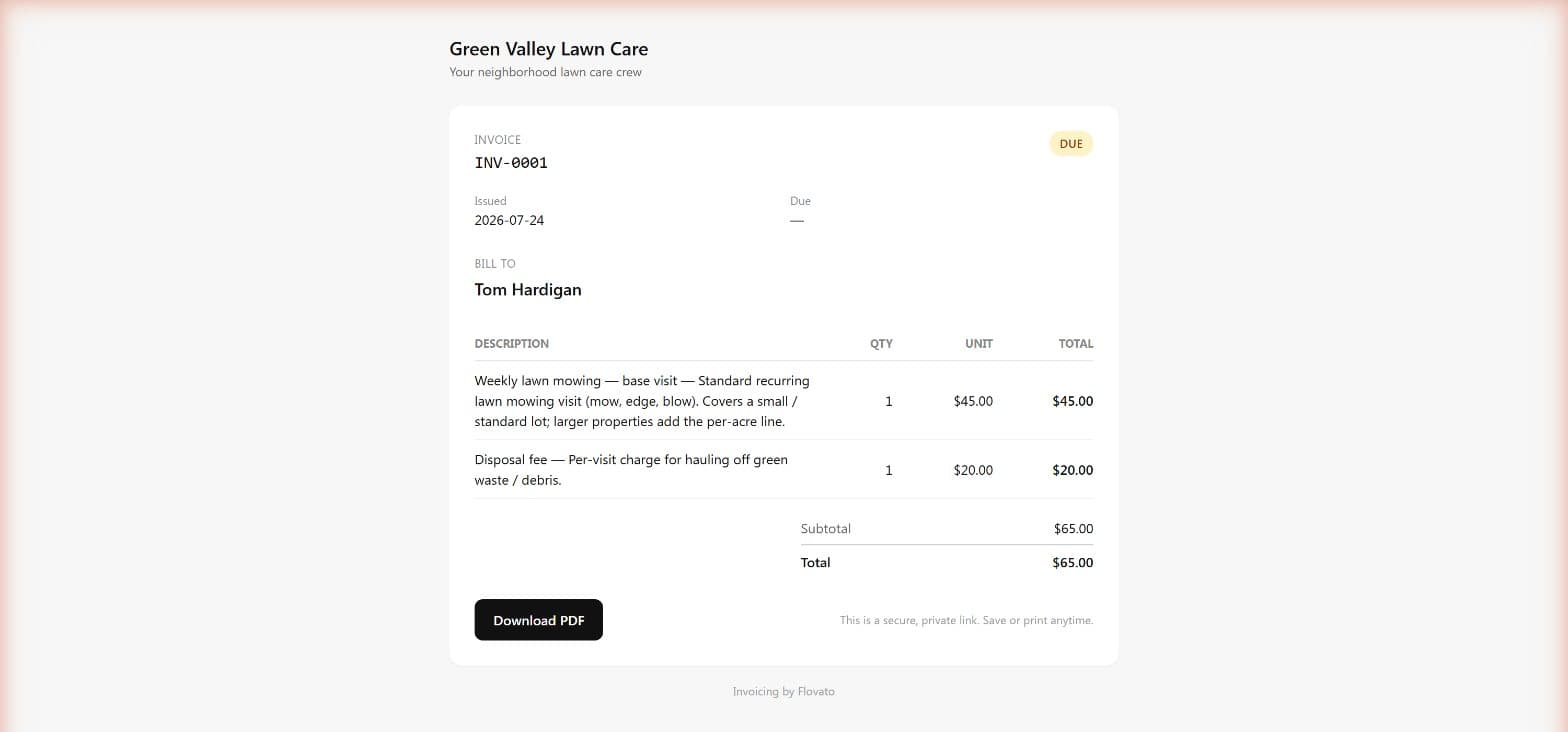
The public view is what they see: your business name and tagline up top, the line items with descriptions, the total, a DUE badge, and their own Download PDF button. No login, no account — the link is the key.
Tom's link opens a clean Green Valley-branded page: INV-0001, both line items, $65.00 total, and "This is a secure, private link. Save or print anytime."
- 6
Record the payment
The invoice → Payments
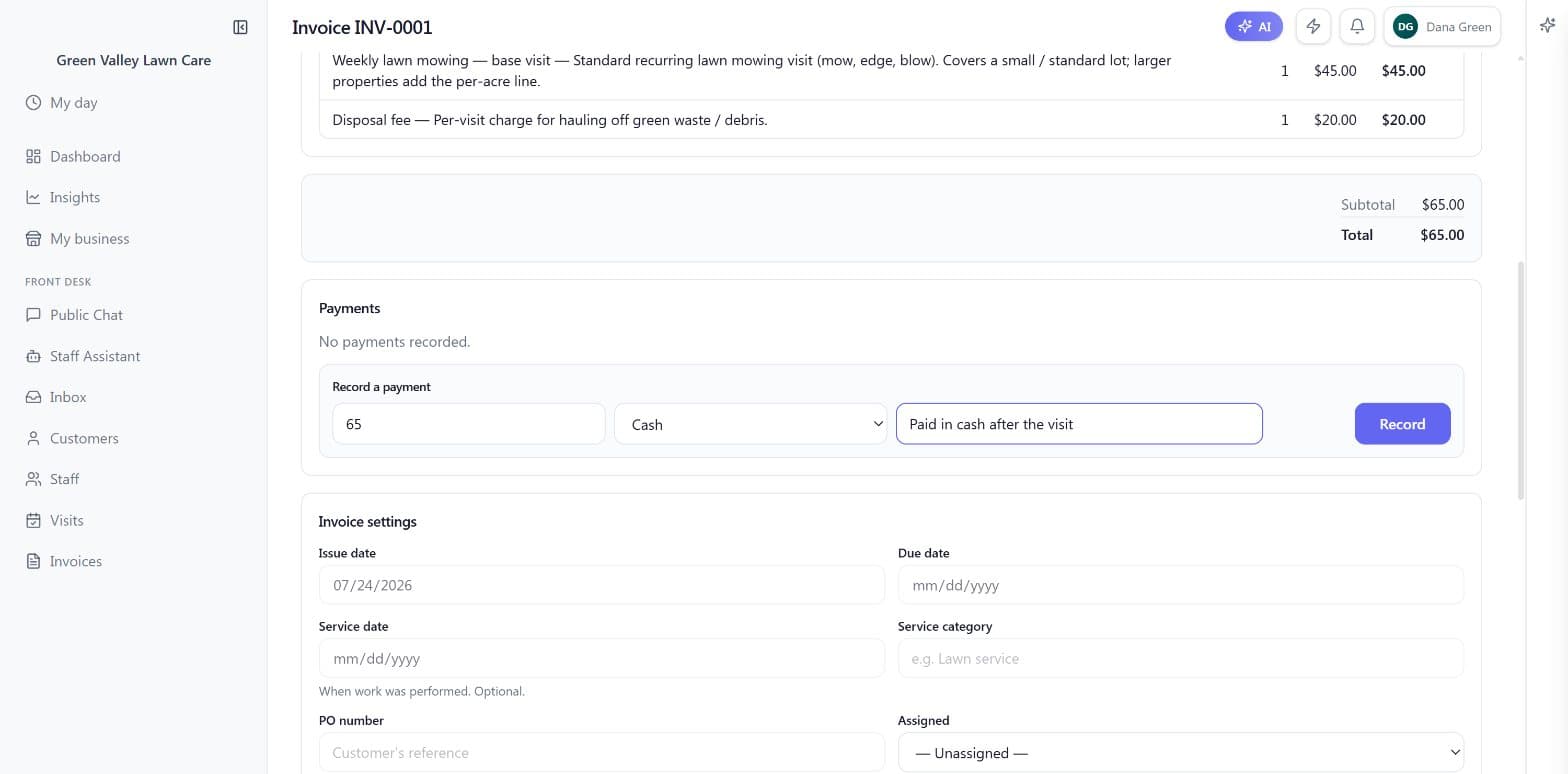
When the money arrives — cash in hand, a check, a bank transfer — record it right on the invoice: amount (the box shows exactly what's still owed), how they paid, and an optional note like the check number.
Hit Record and the invoice flips to a green Paid badge, the dashboard's "Money to collect" clears it, and the whole trail — what was billed, when, how it was paid — lives on one page. Partial payments work too: record what came in and the invoice shows Partial until the rest lands.
Until the money lands, you don't chase it from memory: every unpaid invoice sits on your dashboard under "Money to collect" with the amount due and two one-tap buttons — "Mark paid" and "Send reminder." Open the app in the morning and the follow-up list is already made.
Tom paid $65 cash after the visit. One recorded payment with the note "Paid in cash after the visit" — and INV-0001 went green. Maria's unpaid INV-0002 sat on the dashboard as "Maria Vasquez · $45.00 due" with Mark paid and Send reminder one tap away.
- 7
Give your Assistant the invoice keys
My business → Robots tab → Staff Assistant
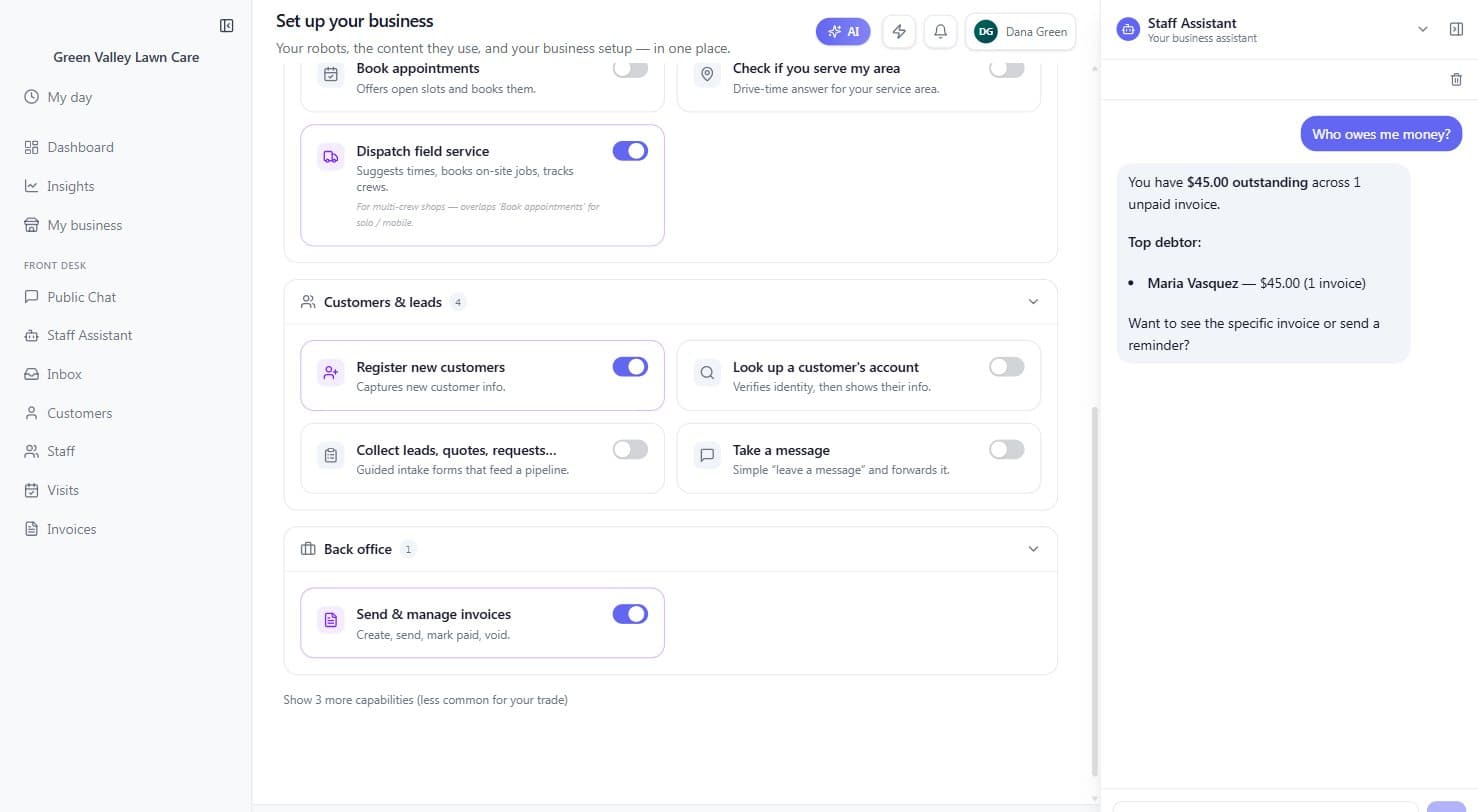
Everything so far was you clicking. Before the Assistant can do it for you, hand it the keys: on the Robots tab, pick the Staff Assistant and look under "What it can do" for the Back office group — the switch is "Send & manage invoices" ("Create, send, mark paid, void."). Most trade blueprints flip it on for you; if yours shows it off, one click fixes that, and the change takes effect immediately.
The neighboring switches decide the rest of its reach — "Dispatch field service" for scheduling, "Register new customers," "Look up a customer's account." Each one is a capability you're granting your own private robot; none of them ever apply to the public chat, which has its own switches.
Switches are per-robot on purpose: giving your signed-in staff's Assistant the invoice keys grants nothing to the website robot — customers can never see your books.
- 8
Your Assistant is watching the books too
Staff Assistant (left menu)
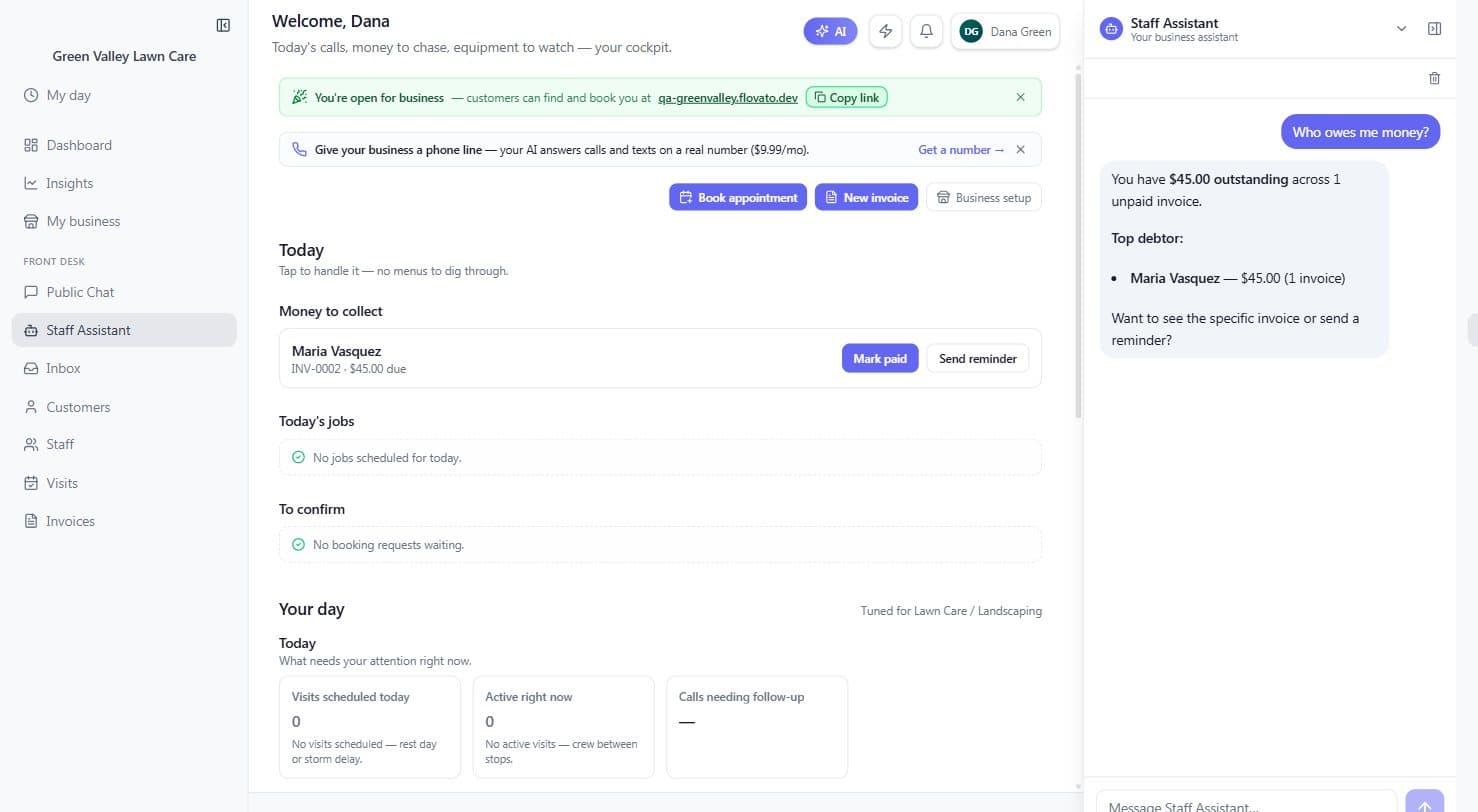
Here's the power move: everything this guide just taught you is also a conversation. Open the Staff Assistant and ask, in plain words, "Who owes me money?" — it totals what's outstanding, names the customers, counts their invoices, and offers the next move: see the invoice, or send a reminder.
That works because your invoices, customers, and prices live in one system the Assistant can read — permission-scoped to whoever's asking. No report to build, no filter to remember. The screen from step 1 is still there when you want the full picture; the Assistant is for the truck, the supply-store line, and the couch.
It acts, too — and levels with you when something's missing. We told it "Resend Maria her invoice with a friendly reminder": it looked up INV-0002, noticed Maria had no email on file, said so plainly, and offered the fixes — save her email in the Customer Manager, or generate the PDF to hand-deliver. Save the email and ask again, and the resend finds the new address; no dead ends, no silent failures.
We asked Green Valley's Assistant "Who owes me money?" — it came back in seconds: "$45.00 outstanding across 1 unpaid invoice. Top debtor: Maria Vasquez — $45.00 (1 invoice). Want to see the specific invoice or send a reminder?"
Ready to try it?
Setting up takes about ten minutes, and the built-in Help assistant is there whenever you get stuck.
Get started